What is Trust Wallet? How to Set Up and Get Started with NFTs
What is Trust Wallet? Learn how to setup and use Trust Wallet to buy, sell, and start your very own NFT collection.

Cryptocurrencies, just like government-issued fiat currency, requires a place to safely store and secure. Digital currencies such as crypto are stored in a digital wallet, also known as a crypto wallet or Web3 wallets. Trust wallet is one of many digital wallet options available.
Trust Wallet is a secure, easy-to-use digital wallet to store cryptocurrencies and non-fungible tokens (NFTs). Having a place to store your digital assets and currencies is the first step into the crypto space, NFTs, the metaverse, and beyond.
In this article, we’ll be taking a closer look at what Trust Wallet is, how it works, how it’s setup and more, so that you can get a head start in the world of cryptocurrencies.
New to crypto? Start with our crypto 101 guide.
What is Trust Wallet?
As prefaced above, Trust Wallet is a digital wallet to securely store cryptocurrencies, non-fungible tokens (NFTs), interact with Web3 applications, send and receive digital assets, and more.
Trust Wallet was designed by anonymous software developers back in 2017 who wanted to create a simple way for everyone to have access to cryptocurrencies. As of this publication, Trust Wallet now has over 25 million+ users and is available on both iOS & Android.
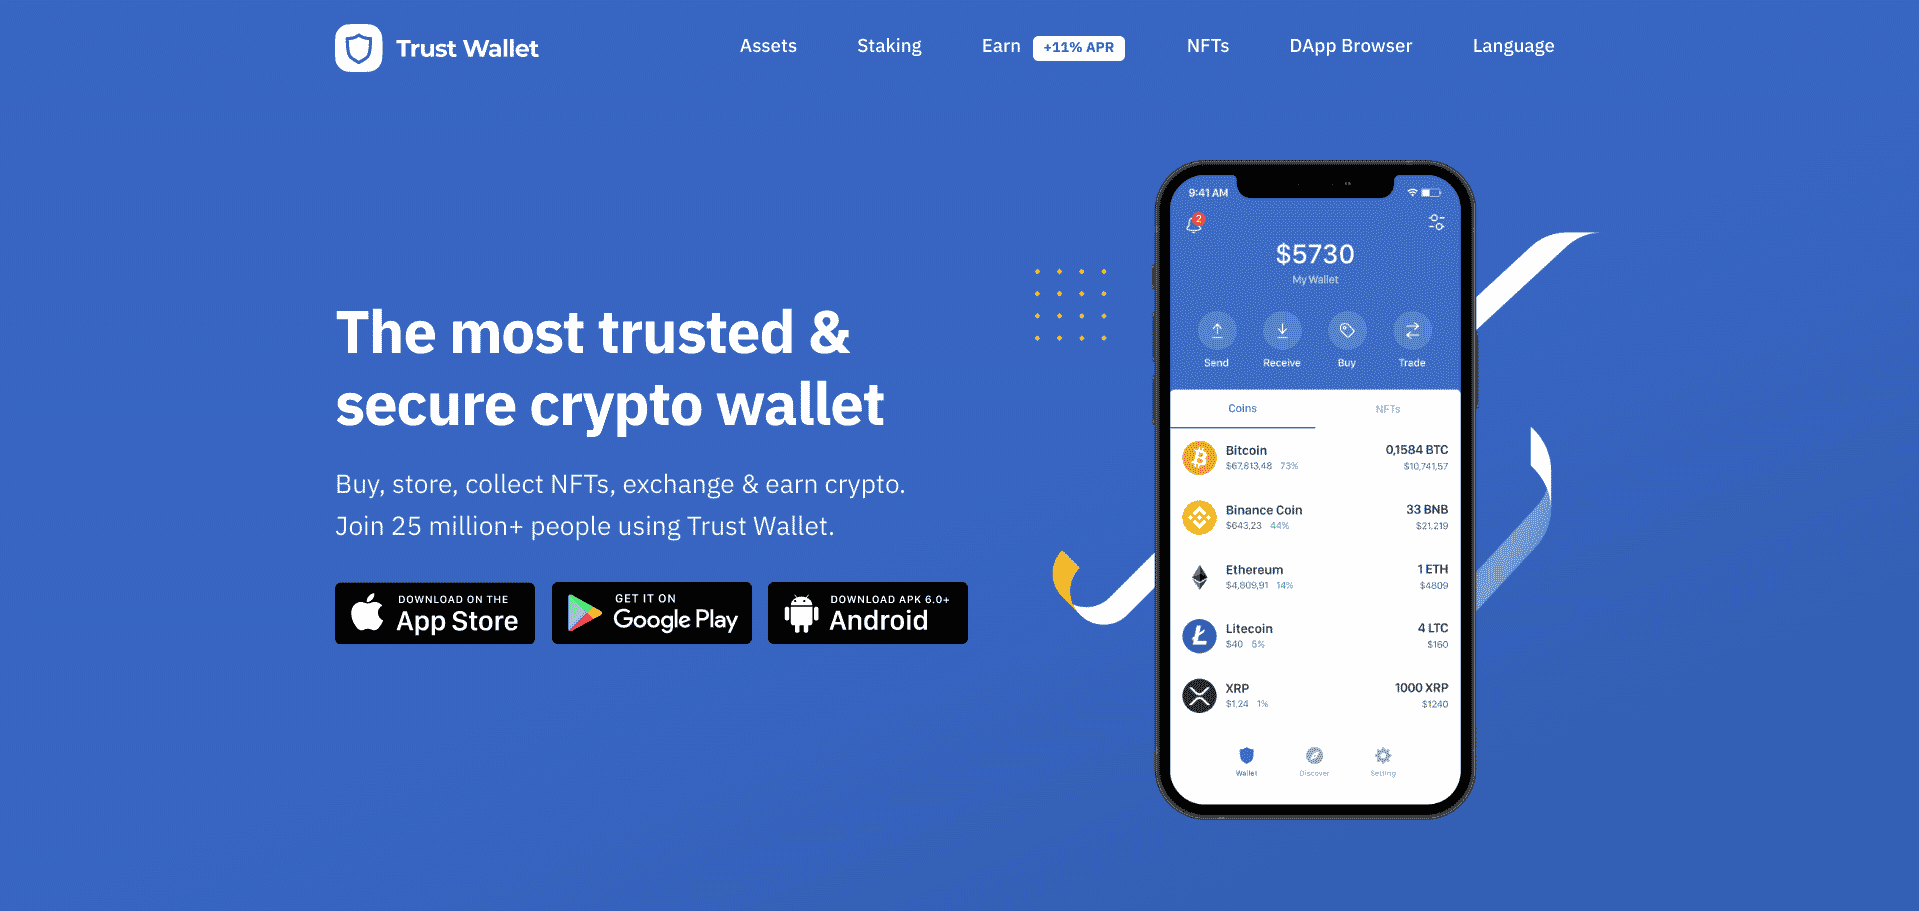
Trust Wallet supports digital assets that are within the Ethereum ecosystem, and also supports ERC20, BEP2, and ERC721 tokens.
The team has also added support for tokens based on the Binance Smart Chain, with more cryptocurrencies continually added.
Know your wallets:
- Custodial wallets entrust the security of your assets with a third party while offering the benefits of accessibility and ease of use (at least, for beginners).
- Non-custodial wallets leave you the full control of your fund’s security to your hands.
Learn more: Custodial Vs Non-Custodial Crypto Wallet.
How to use Trust Wallet?
Trust Wallet is relatively simple to setup and use. Most NFT marketplaces now also support Trust Wallet integration, expanding its compatibility.
For those new to crypto wallets, follow our walkthrough below to get started with Trust Wallet.
Step 1. Download Trust Wallet on your device
Trust Wallet supports both iOS and Android. Just go to the App Store or Google Play, download it, and install it on your device. After installing Trust Wallet on your device, proceed to open the app.
Step 2. Set up your Trust Wallet
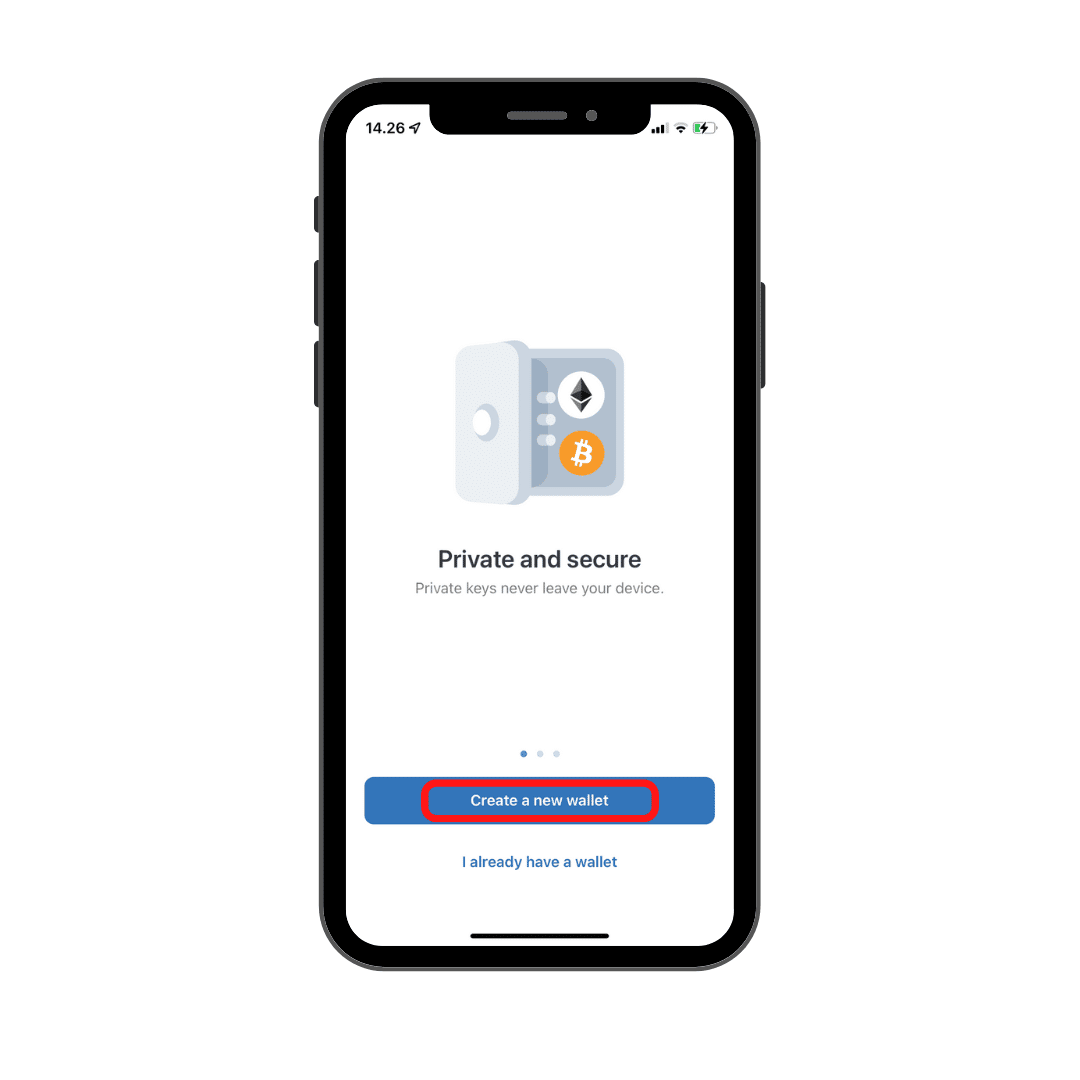
Click “Create a new wallet” then they will need you to create a passcode. If you choose to import an existing wallet, you will need to enter your 12-word backup phrase as well as the password for that wallet.
Step 3. Your Trust Wallet is ready to use
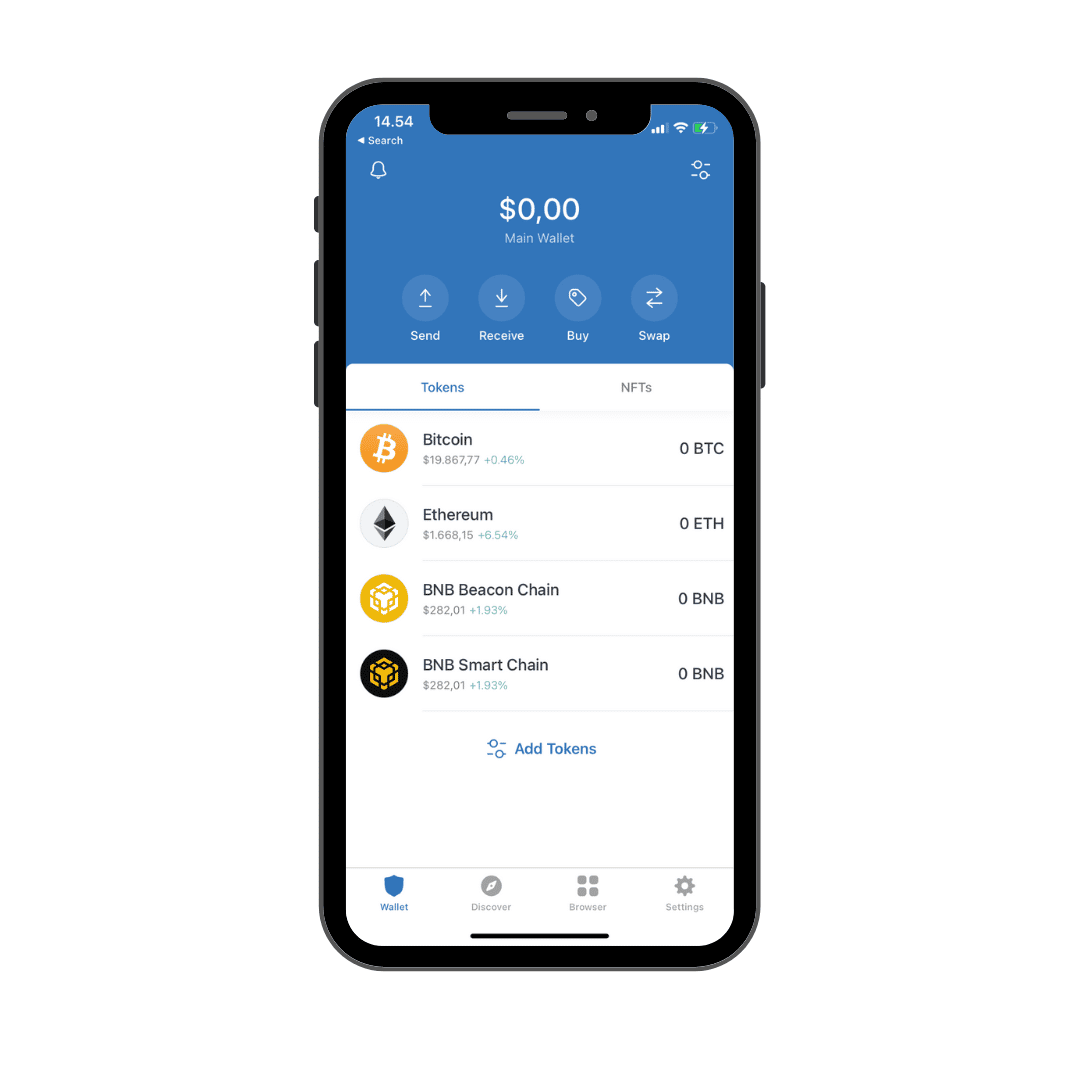
Once you have completed this process, Trust Wallet will automatically synchronise with the blockchain. You can then view your total balance and transaction history of all coins in your wallet.
Transferring cryptocurrencies to Trust Wallet
Now that you’ve got Trust Wallet setup and ready to go, the next step is to add crypto funds to your wallet.
With Easy Crypto, you can easily add funds with your local currency and we’ll send the crypto fund directly to your Trust Wallet address.
Follow the steps below to transfer funds to your Trust Wallet with Easy Crypto.
- Sign in to your Easy Crypto Account.
If you’re a new user — welcome! Click on the Sign-up button to create an account and proceed with the account verification process.
If you’re an existing user, proceed to log in to your account with your credentials. - Select the cryptocurrency you want to buy.
Navigate to the homepage and select the cryptocurrency you want to buy and enter the amount of ZAR you want to spend.
Then, click the Buy Now button. - Enter your wallet’s receiving address.
Once you’ve finished choosing your crypto asset, enter your wallet receiving address to the corresponding cryptocurrency you want to purchase.
- Select your preferred payment method.
Choose the payment method that you prefer from our selection of payment options.
Tip: Make sure that you are logged into the correct country website. For example, if you verified.
your account with Easy Crypto South Africa, be sure to log into EC ZA to be able to transact.
Get started transferring your cryptocurrencies to Trust Wallet.
Related: What are non-fungible tokens (NFTs)?
Connect Trust Wallet to NFT Marketplace
As mentioned above, NFT marketplaces will require you to connect a Web3 wallet to interact, buy, sell, and create NFTs on the platform.
For this example, we’ll be showing you how to connect the Trust Wallet to OpenSea, one of the most popular NFT marketplaces on the web.
First, open your OpenSea app and click “Profile”. It will ask you to connect your wallet. This will open a popup of its app.

Second, once it’s popped up, click “Browser” in the down right corner.
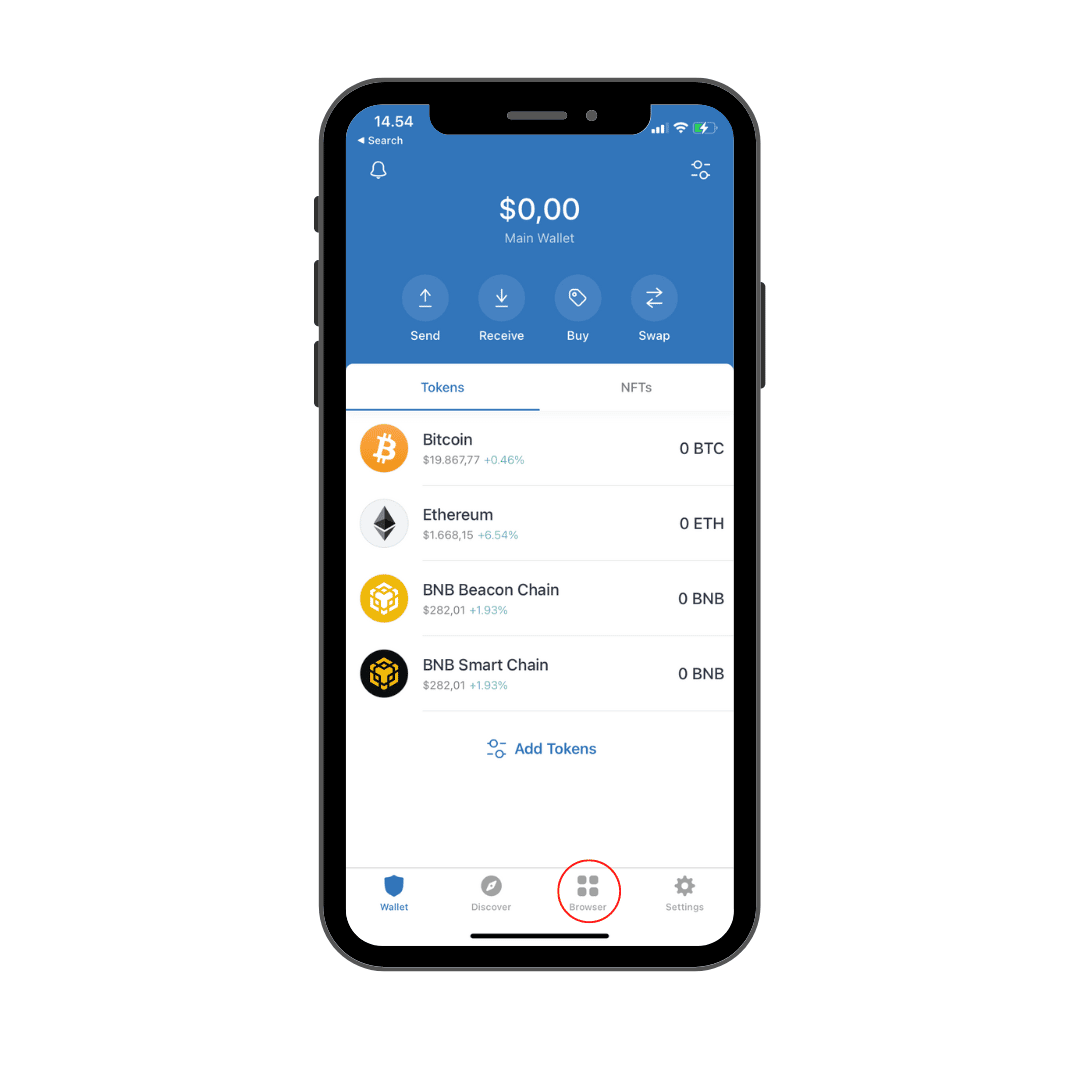
Third, then browse “OpenSea” in this wallet. You might be wondering why I needed to browse rather than use the app? The answer is that OpenSea does not allow users to buy NFTs via its official app; instead it functions as a browsing experience. So you still have to search for it on the app.
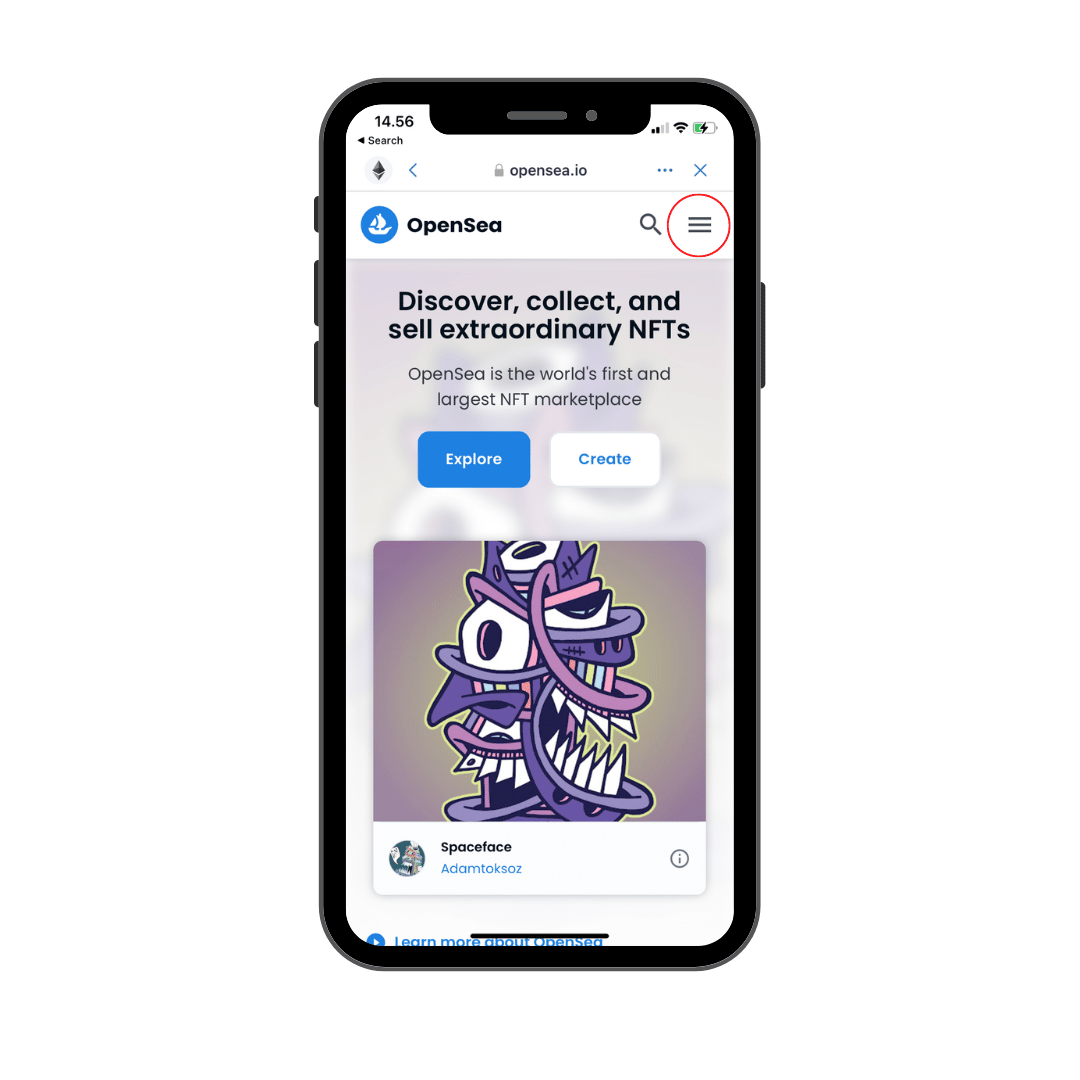
Fourth, click the three strips in the top right corner of your screen and click “Connect Wallet.” Then choose “Trust” from the drop-down menu. Your wallet will now be connected to your account on OpenSea.
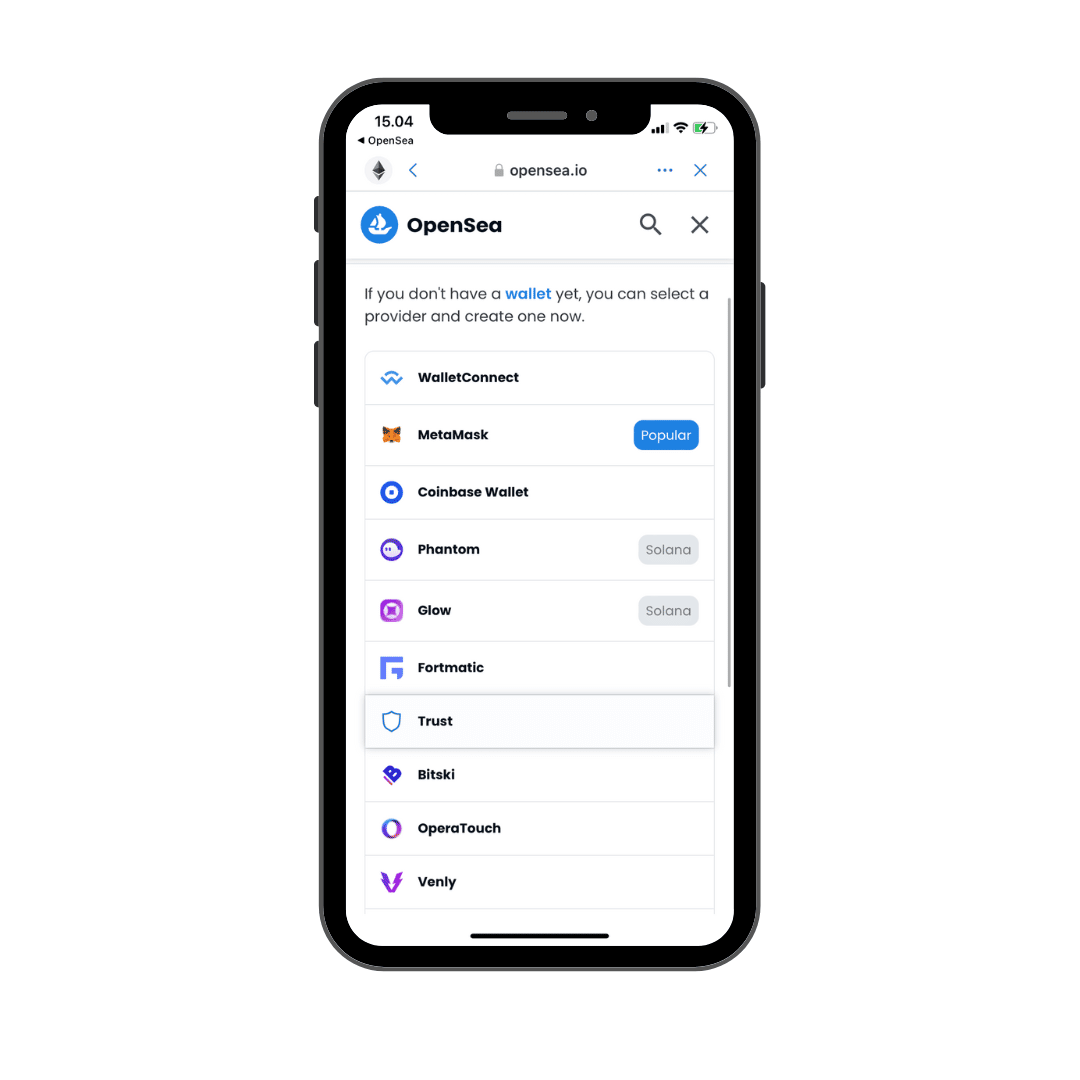
Learn more: How to Buy NFTs in the OpenSea?
Keeping your assets safe
Buying and storing crypto is the easy part. The next step you must should keep in mind are the safety practices to keep your assets safe and secure.
Below are some things to keep in mind:
- Do NOT ever share your seed phrase/backup phrase with anyone you don’t trust.
- If you encounter anyone asking for your backup phrase, there is a high chance it’s a scam. Proceed with caution. (Take our quiz to find out).
- Activate two-factor authentication (2FA) on your device, and wherever it is available.
- If your device supports it, activate biometrics to add another layer of security.
Alternatively, if you’re someone who wants to have the highest level of protection for your crypto assets, consider buying a crypto hardware wallet such as Trezor and Ledger.
Both are cold wallets, meaning they store your assets in an offline environment, and also require you to physically authenticate any and all transactions.
More wallet and security tips:
Takeaways
To recap, Trust Wallet is a non-custodial wallet that gives you the security of owning cryptocurrencies and non-fungible tokens (NFTs). It allows you to access all the features you need in a digital wallet, including sending, receiving, and storing digital currencies.
Whether you’re buying digital collectibles or interacting with decentralised applications (DApps) and other users on the Ethereum blockchain, Trust Wallet has all bases covered for you.
If you’re curious about NFTs or other cryptocurrencies topics. Read our related articles on our learning Hub.
Share to
Stay curious and informed
Your info will be handled according to our Privacy Policy.
Make sure to follow our Twitter, Instagram, and YouTube channel to stay up-to-date with Easy Crypto!
Also, don’t forget to subscribe to our monthly newsletter to have the latest crypto insights, news, and updates delivered to our inbox.
Disclaimer: Information is current as at the date of publication. This is general information only and is not intended to be advice. Crypto is volatile, carries risk and the value can go up and down. Past performance is not an indicator of future returns. Please do your own research.
Last updated May 2, 2023


