A Complete Beginner’s Guide to Layer 2 Chains
What are Layer 2 Chains and why are they important? Find out more about them in this beginner's guide to Layer 2 blockchains.
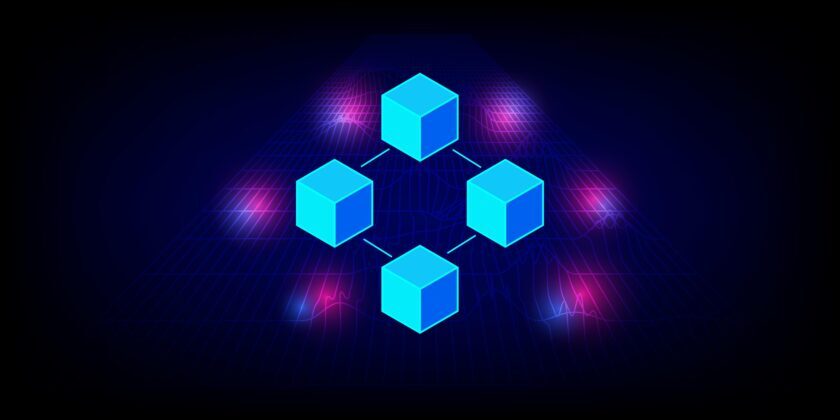

In a nutshell: Layer 2 chains or Layer 2 networks are designed to help Layer 1 blockchains like Bitcoin and Ethereum to process crypto transactions much faster and more cheaply.
In a sense, Layer 2 chains off-load transactions from Layer 1 chains to the Layer 2 chains. Then, to guarantee blockchain security, the “summary” of the transactions on the Layer 2 chains will be posted into the Layer 1 blockchains.
New to blockchains? Read our basics guide on blockchain technology.
The dreaded blockchain problems
Here’s a common scenario: You’d like to invest in Bitcoin, Ethereum, and other interesting Ethereum-based projects like Polygon, Chainlink, Uniswap, and many more utility tokens for some very useful protocols.
However, you notice that when you use either the Bitcoin or Ethereum networks, the transaction fees don’t look friendly to you. You ask yourself, how is it possible that it costs $20* for transferring a token worth $10 (or input your amount).
(*It doesn’t always cost $20 to transfer assets on Ethereum, only when the network gets so busy).
There’s also another problem that’s plaguing the two most popular crypto networks in the world — transaction speed.
Critics of Bitcoin and Ethereum would say that it’ll never reach global adoption because a transaction would take 10 minutes for Bitcoin and 4 minutes for Ethereum.
Even if a coffee shop were to accept Bitcoin, who on Earth would wait around for 10 minutes to make a Bitcoin transfer? The coffee would get cold before the receipt gets printed.
Yet, time and time again, crypto enthusiasts claim that Bitcoin and Ethereum are going to be the future of finance because of their robust and incorruptible blockchains.
People used to accept the fact that we can’t have security without sacrificing speed, convenience, and lower fees — but that belief has been overturned.
Layer 2 networks are the solution to allow classic blockchains to scale to the next billion users. Through a careful balancing act between speed and security, Layer 2 and Layer 1 networks work together to provide a seamless experience when using decentralised finance applications.
There are many Layer 2 networks that help Bitcoin, Ethereum, and other blockchains to scale up.
However in this article, we’ll mention six most common networks you can use to help you cut down on network fees and enjoy a seamless transacting experience.
Lightning Network for Bitcoin
Lightning Network is the biggest Layer 2 Network for the Bitcoin blockchain. Because of its popularity, the country of El Salvador implemented a nationwide adoption of the Lightning Network to help its citizens adopt Bitcoin.
You may know that transferring units of Bitcoin through its original network could take a very long time if the sender doesn’t include a “tip” to the Bitcoin miners who process the transactions.
With a limited space for which transactions can be processed every 10 minutes, senders must compete with each other by outbidding each other with higher fees.
When using the Lightning Network at a time when the network traffic is high, a user may need to wait a couple of minutes. Otherwise, the transfer confirmation is instantaneous.
To use the Lightning Network, you’ll have to create a wallet that is compatible with the Lightning Network.
Here’s a step-by-step guide on getting started with a popular Bitcoin Lightning Network wallet called Phoenix:
How to use Phoenix Bitcoin Lightning Wallet
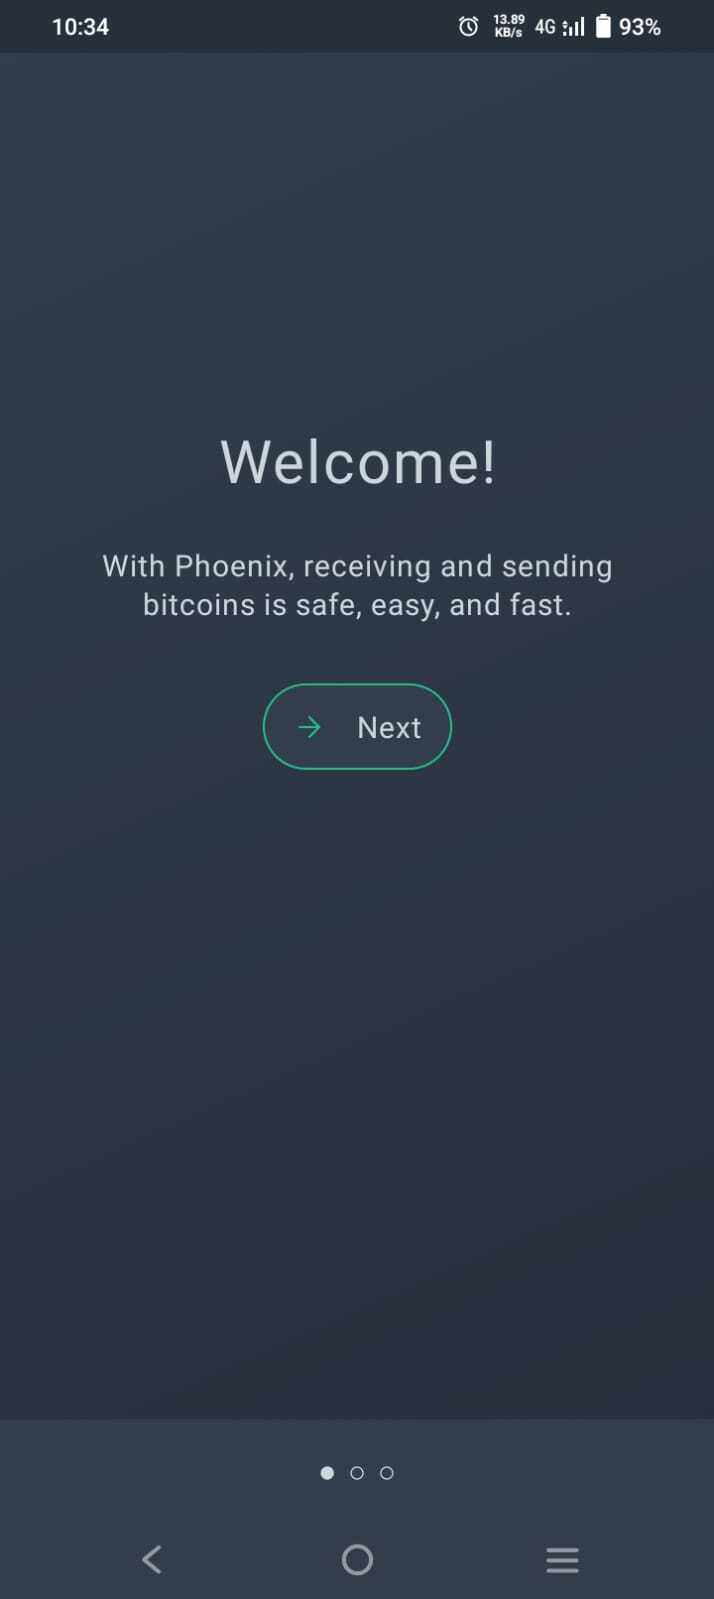
Step 1. Find the app download link from their official website. When you open the app for the first time, you should see this screen.
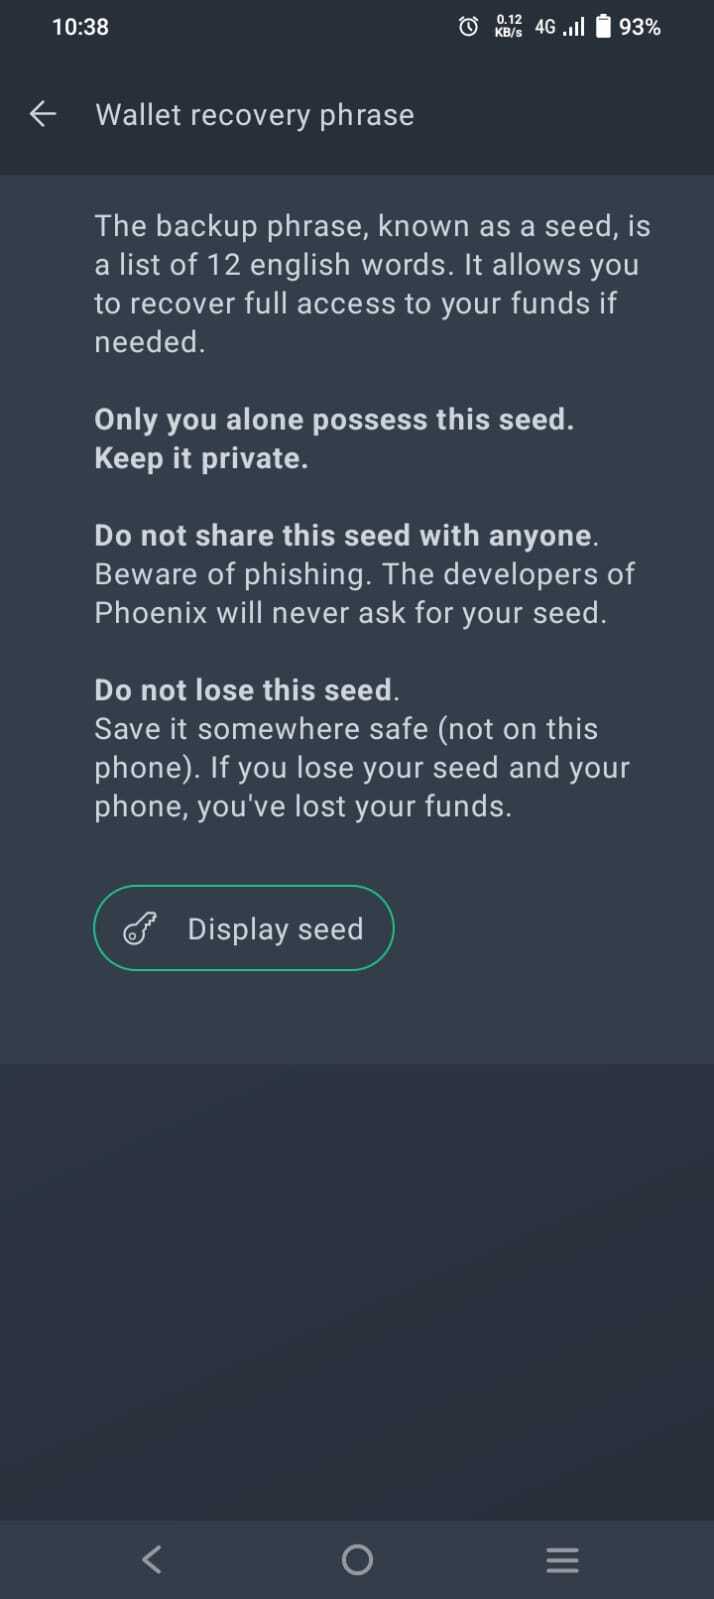
Step 2. Continue and agree with the terms and conditions. Then, back up your wallet with the recovery phrase (backup phrase).
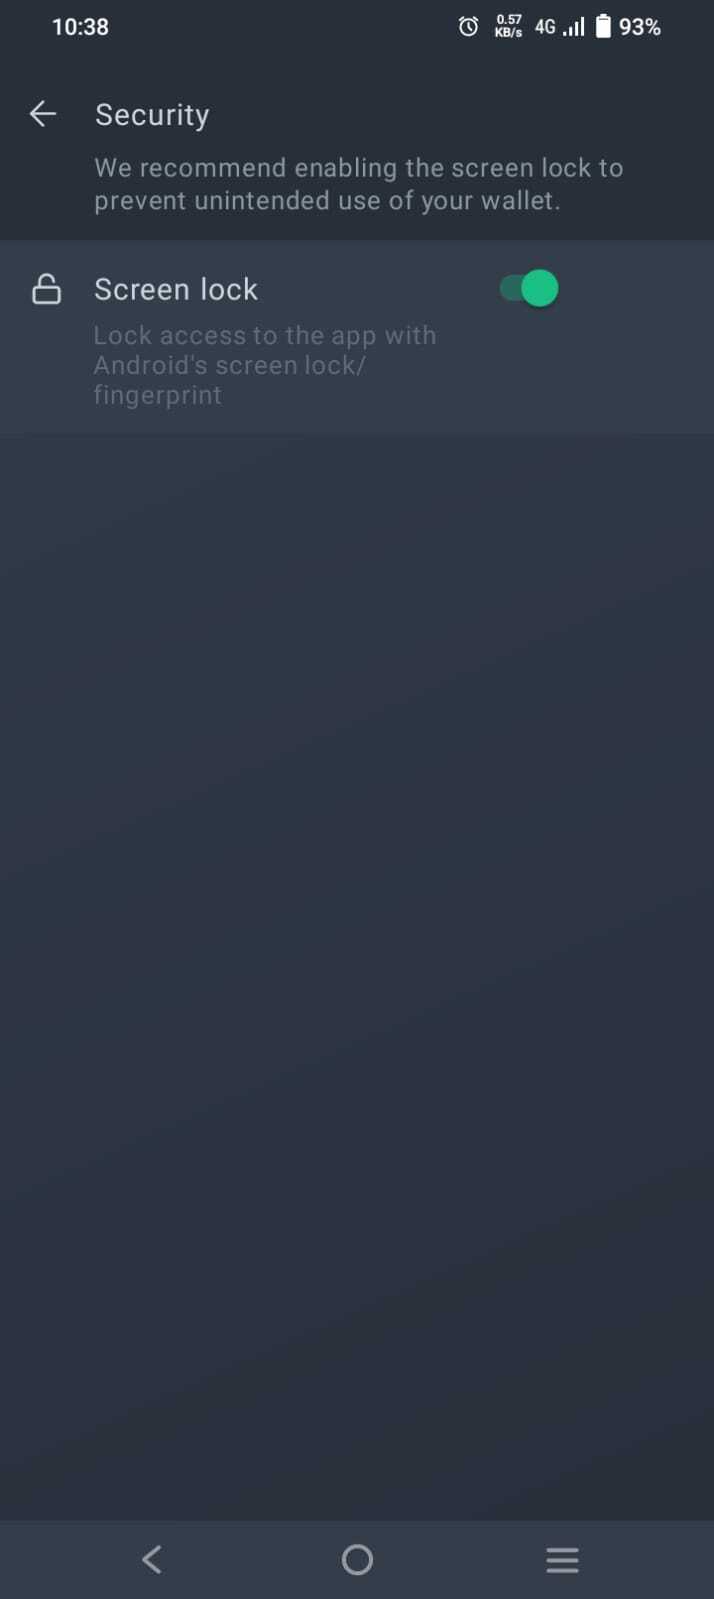
Step 3. Enable the Screen Lock. It will use your phone’s built-in access controls, such as a fingerprint scan, a passcode, or PIN.
Step 4. Tap “Receive” to reveal your Lightning Network wallet’s receiving address.
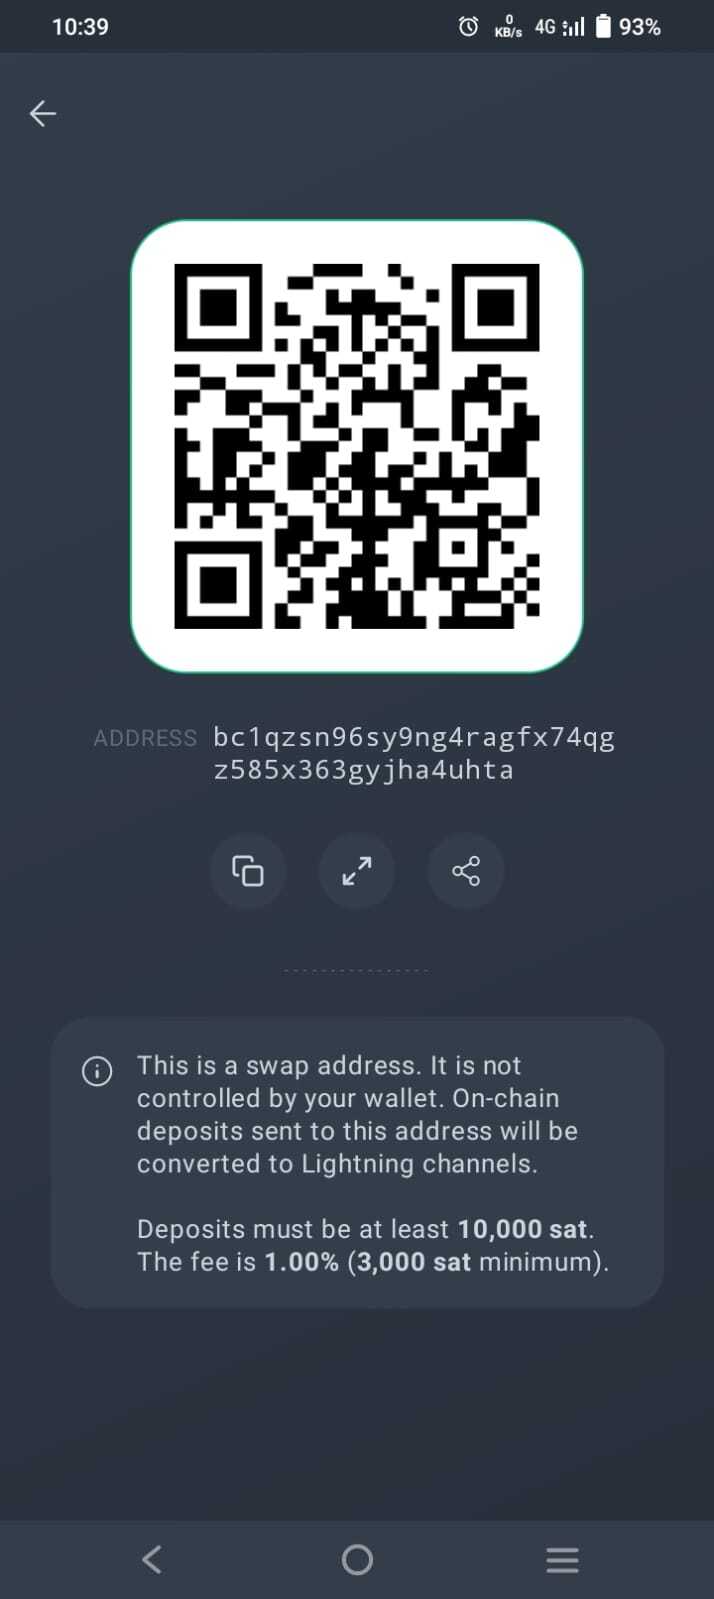
If you’re confused about the statement below it, don’t worry — sending bitcoin to this address will still mean receiving the exact bitcoin (minus fees) that you intend to send into your Phoenix wallet.
Ethereum’s Layer 2 networks
We’ll start with Polygon. Polygon is the biggest Layer 2 scaling solution for Ethereum, and it offers a very low-cost way to transfer ERC-20 assets like UNI, LINK, COMP, MKR, and more.
You could use Polygon if you want to use DeFi apps like decentralised exchanges, and be certain that the tokens that move to your wallet will remain there securely.
To use Polygon, you can first download MetaMask.
MetaMask started as an Ethereum wallet, but because Polygon is pretty much compatible with Ethereum, you can add Polygon Network manually once you’ve created your MetaMask wallet.
Follow the steps below to get started:
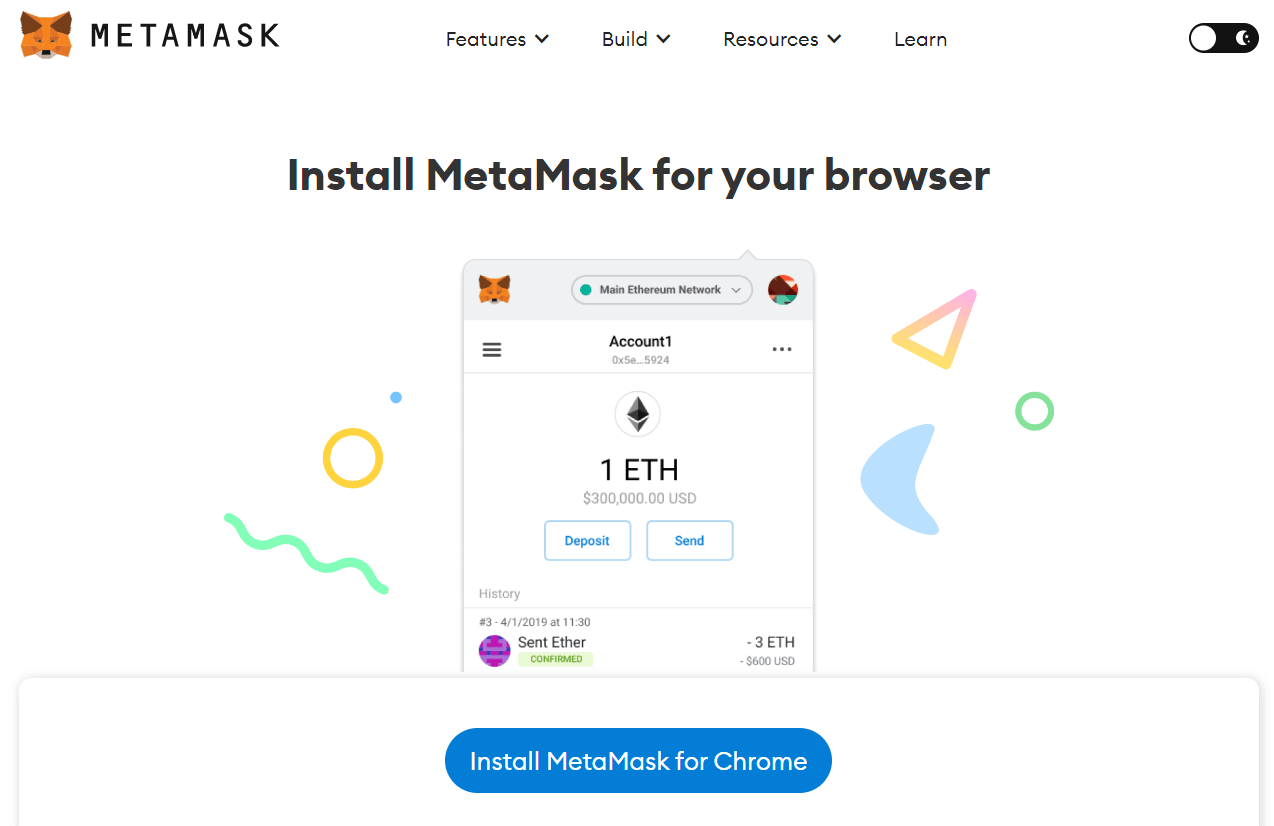
Step 1. Go to the MetaMask official website and select the download link for your favourite browser.
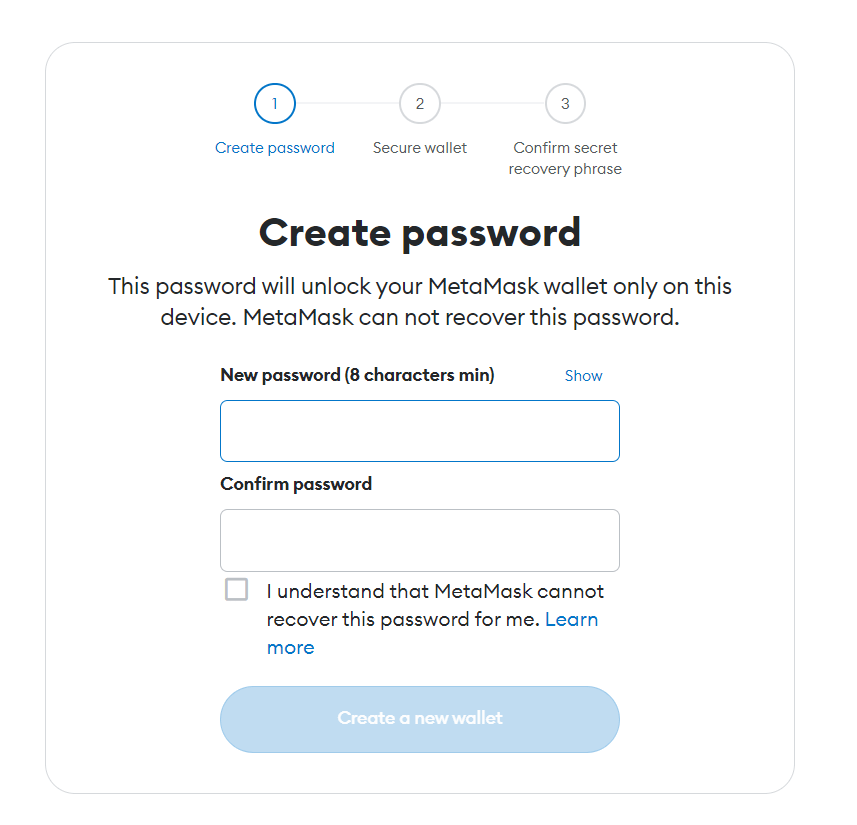
Step 2. Create a password for your MetaMask app. This password is only used to unlock your wallet whenever you exit the browser or lock your wallet. If you lose this password, you can always create a new one using your recovery phrase.
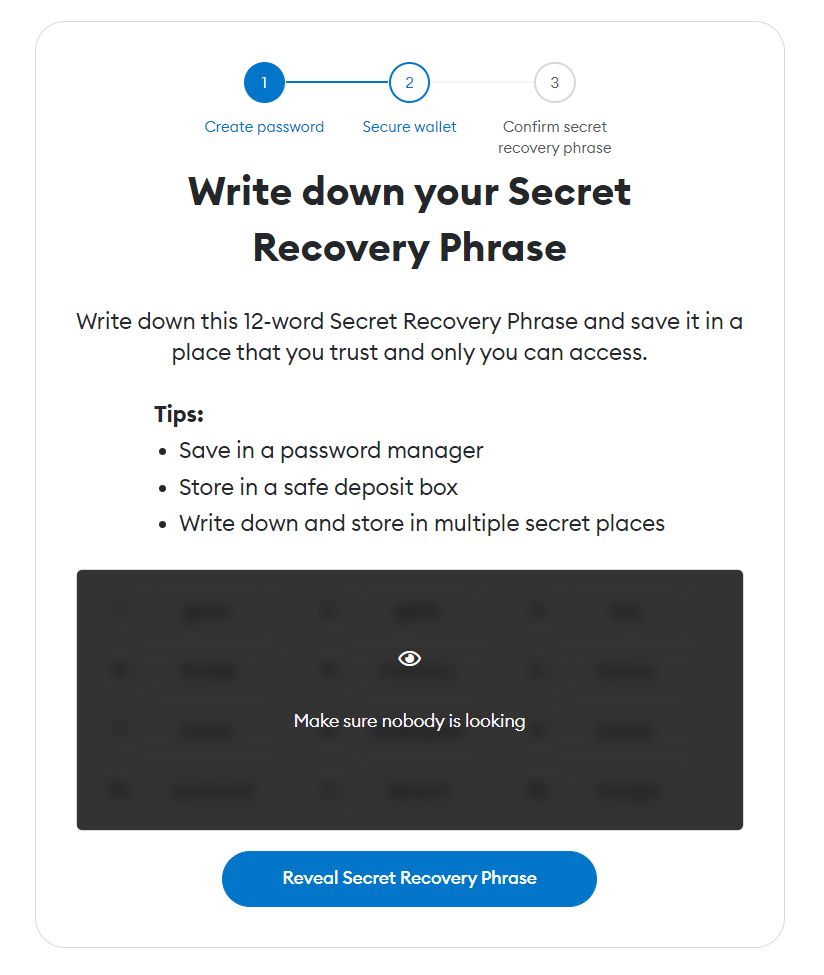
Step 3. Back up your recovery phrase and confirm that you have written down your phrase.
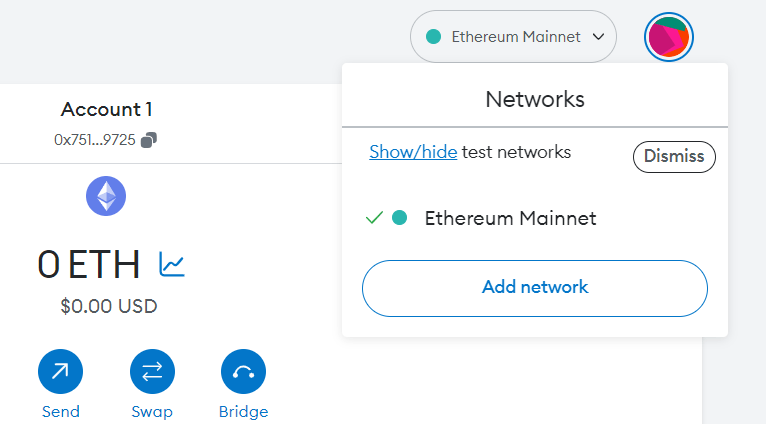
Step 4. Open your MetaMask wallet. By default, it will connect to the Ethereum blockchain.
Since we’re going to work with Polygon, we need to do some tweaking. Click on the drop down menu that says “Ethereum Mainnet” next to your avatar. Then click on “Add network”.
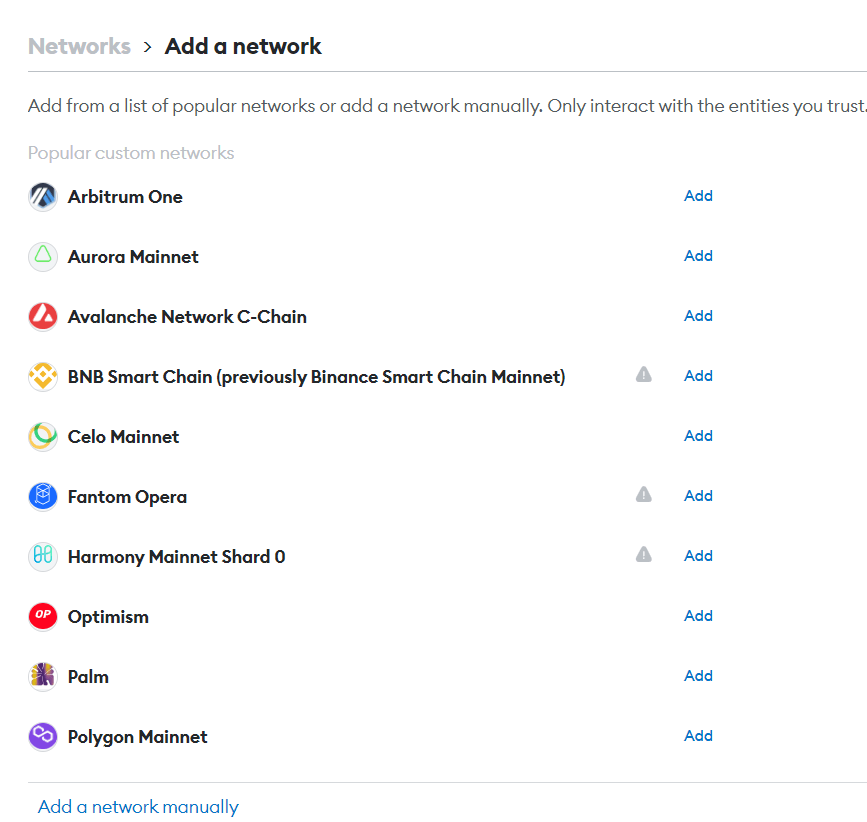
Step 5. View all the available networks to add to MetaMask, and find “Polygon Mainnet”.
Click “Add” so that your wallet can interact with the Polygon blockchain. Click “Approve” when a prompt appears.
Step 6. Once your wallet has switched to the Polygon network, the default view would look like this. Notice that your “primary currency” is no longer ETH, but MATIC, Polygon’s native cryptocurrency. To receive ERC-20 tokens with Polygon, copy your wallet address.
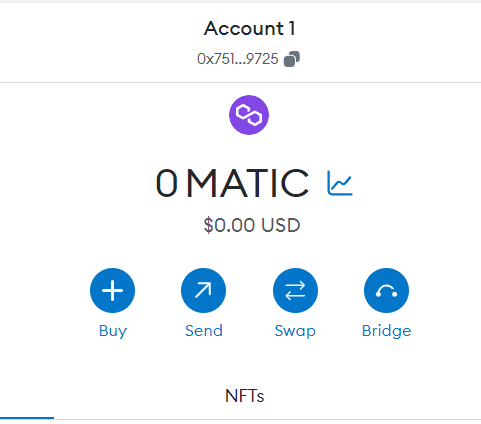
Also, notice that your wallet’s receiving address is still the same as before.
This is very convenient because you only have to deal with a single receiving account, whether you want to work with the Ethereum blockchain, Polygon, or other Layer 2 networks.
However, you must pay attention to which network you’re working with whenever you want to receive crypto from an exchange.
Let’s say that you’re buying USDT stablecoin through Easy Crypto. You can choose how Easy Crypto sends you the USDT.
Do you want it on the Ethereum network (and pay a higher network fee)? If not, tweak the settings so that you receive USDT on the Polygon network (and pay a lower network fee!).
More on MetaMask: Follow our guide to set up MetaMask.
What about the other Layer 2 networks on Ethereum?
While Polygon has served Ethereum users well, newer Layer 2 blockchains also have their perks as they build off the legacy that Polygon provides.
If you want to try out three other popular Ethereum Layer 2 networks, you can go ahead and try Arbitrum, Optimism, and Loopring.
To use these networks with MetaMask, simply follow the same steps used to connect with Polygon, but on step 5, select the appropriate network that you want to use.
Notice that there are networks here that are not part of the Ethereum Layer 2 family, such as Avalanche, BNB Smart Chain and Fantom.

What are those doing there? Well, these networks are lightning-fast Layer 1 networks that are alternatives to Ethereum.
Because they use the same programming language as Ethereum (for smart contracts), MetaMask is compatible with them as well.
However, please note that they are not related to Ethereum and can make your crypto experience a lot more complicated.
This guide is meant for beginners, but if you’re a brave one, you can always explore and use other blockchains with the same wallet address you created through MetaMask.
As always, it’s important to do further reading on how crypto works, and recognise that crypto assets are volatile and have their own risks that may lead to financial loss.
Further reading: Browse our library of crypto content in our learning hub.
Share to
Stay curious and informed
Your info will be handled according to our Privacy Policy.
Make sure to follow our Twitter, Instagram, and YouTube channel to stay up-to-date with Easy Crypto!
Also, don’t forget to subscribe to our monthly newsletter to have the latest crypto insights, news, and updates delivered to our inbox.
Disclaimer: Information is current as at the date of publication. This is general information only and is not intended to be advice. Crypto is volatile, carries risk and the value can go up and down. Past performance is not an indicator of future returns. Please do your own research.
Last updated February 17, 2025


